Budget & expenses
Manage your travel budget and expenses
This guide explains how to record, organize and review travel expenses with WanderSpend before and during your trip. As a permanently free travel budget tracker, the app connects planned budgets with the actual costs of your journey.
After this guide
You will understand the Budget Card, know how to record and split expenses, and see how Balances calculates who owes whom.
1. Use the Budget Card as your trip overview
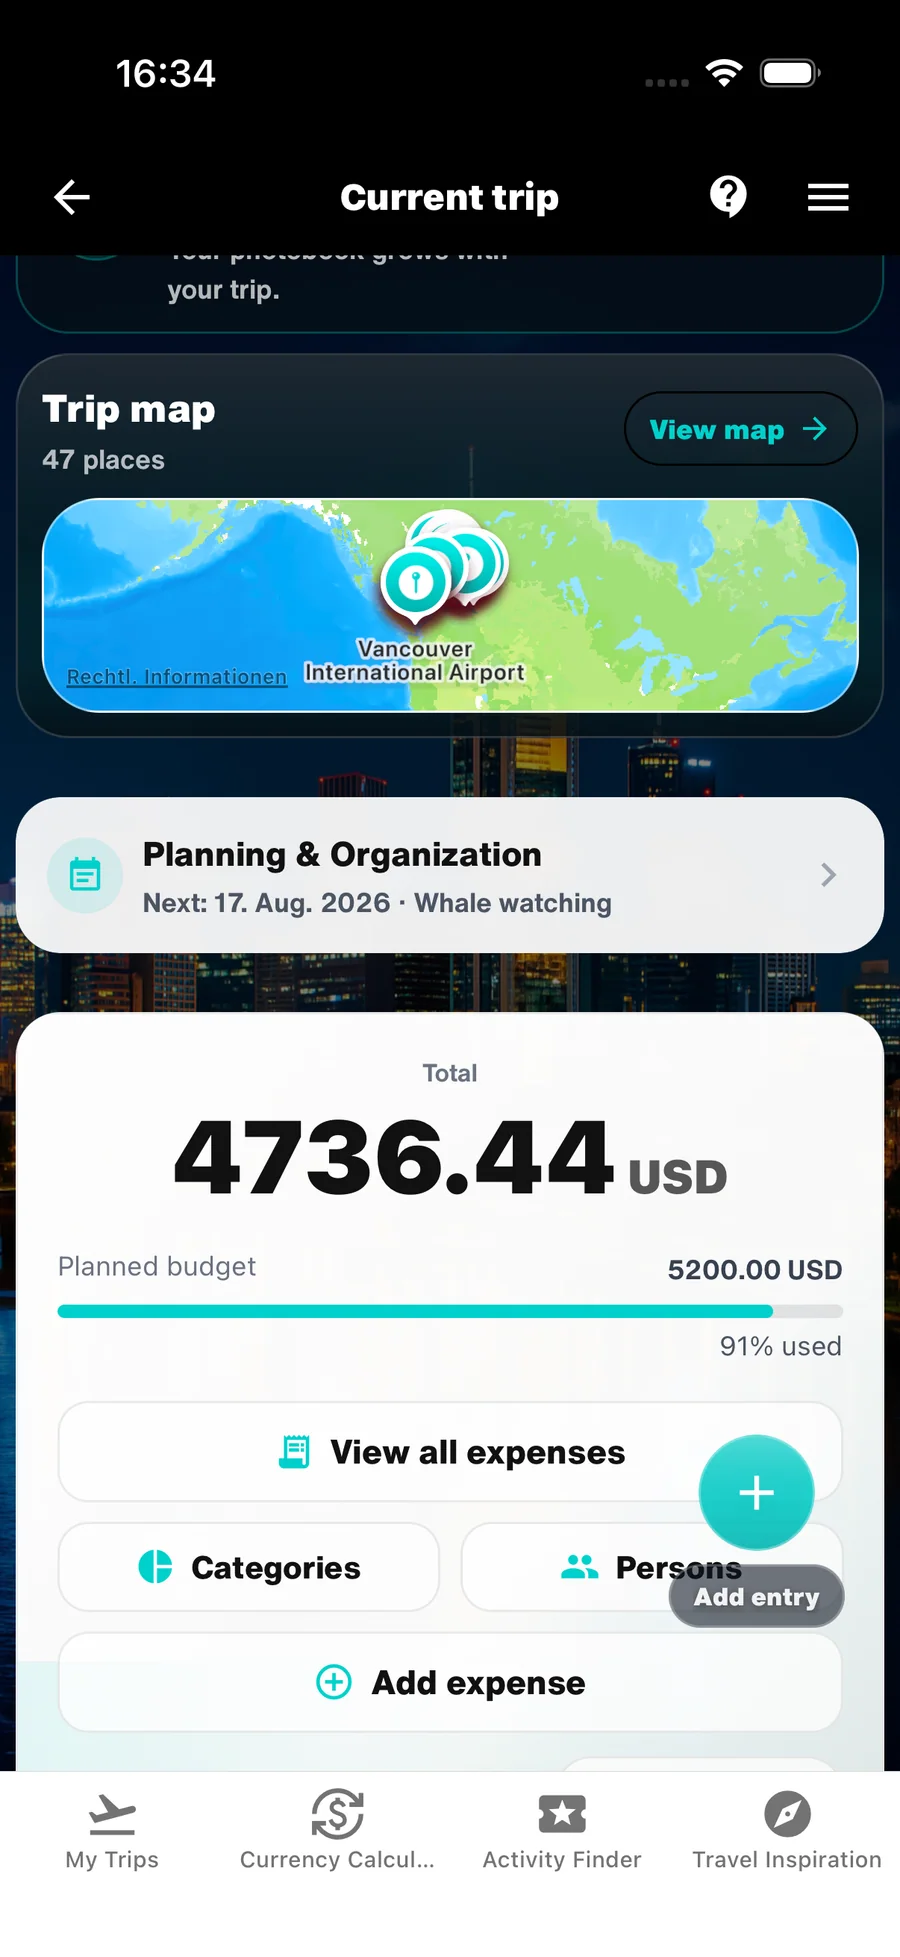
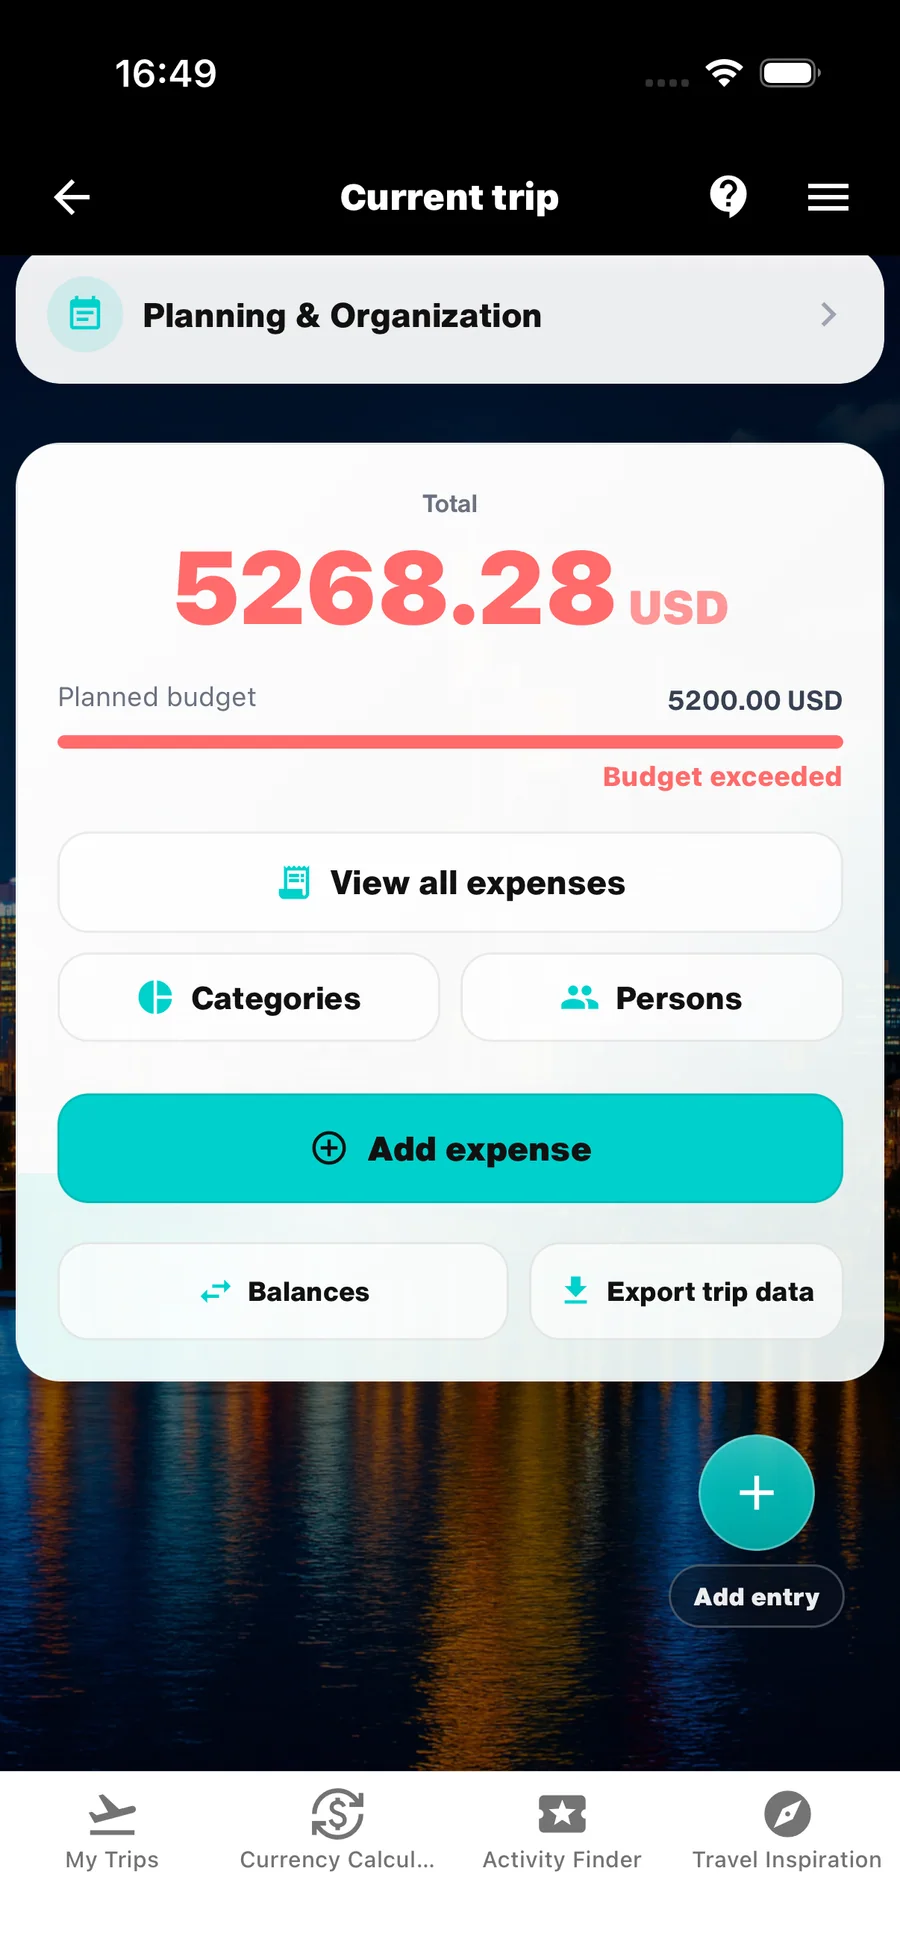
The Budget Card is your central overview of planned and actual travel costs. It shows how much you have spent and which categories account for the largest share.
Use the Budget Card for orientation rather than as a daily score. It helps you understand your costs and adjust early when necessary.
- Keep planned budgets and actual expenses together in one place.
- Open a category when you want to see exactly where the money went.

2. Record, edit and correct travel expenses
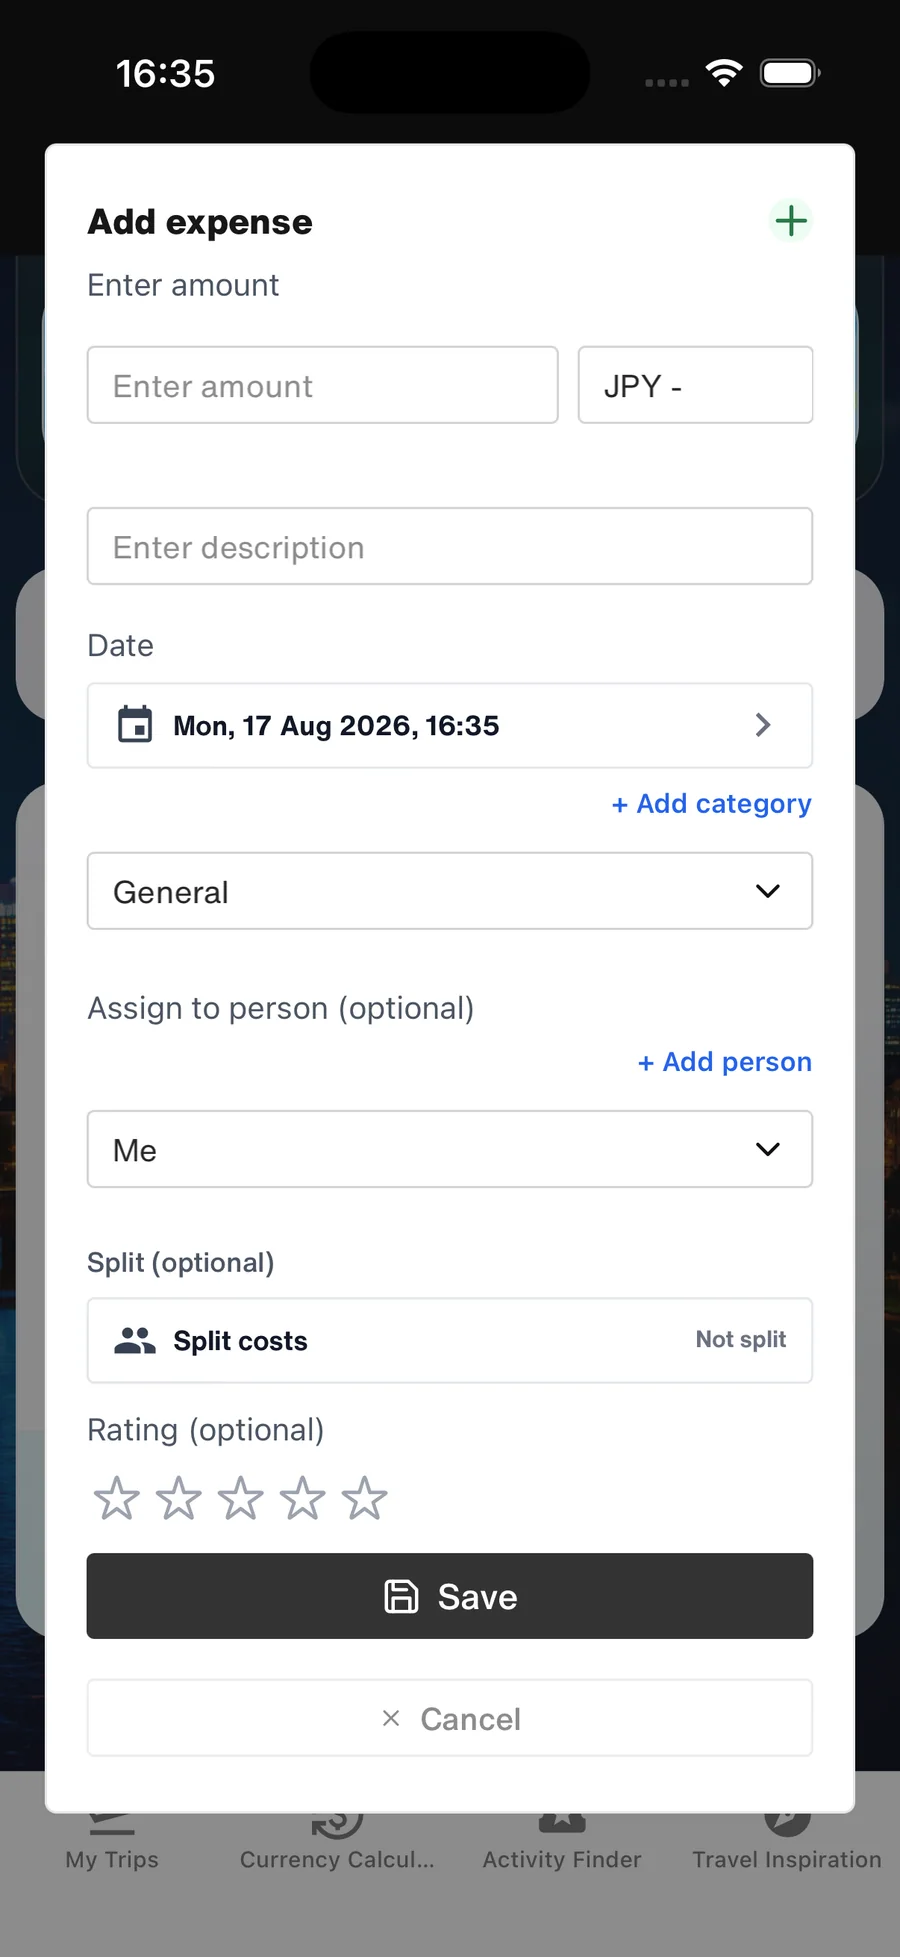
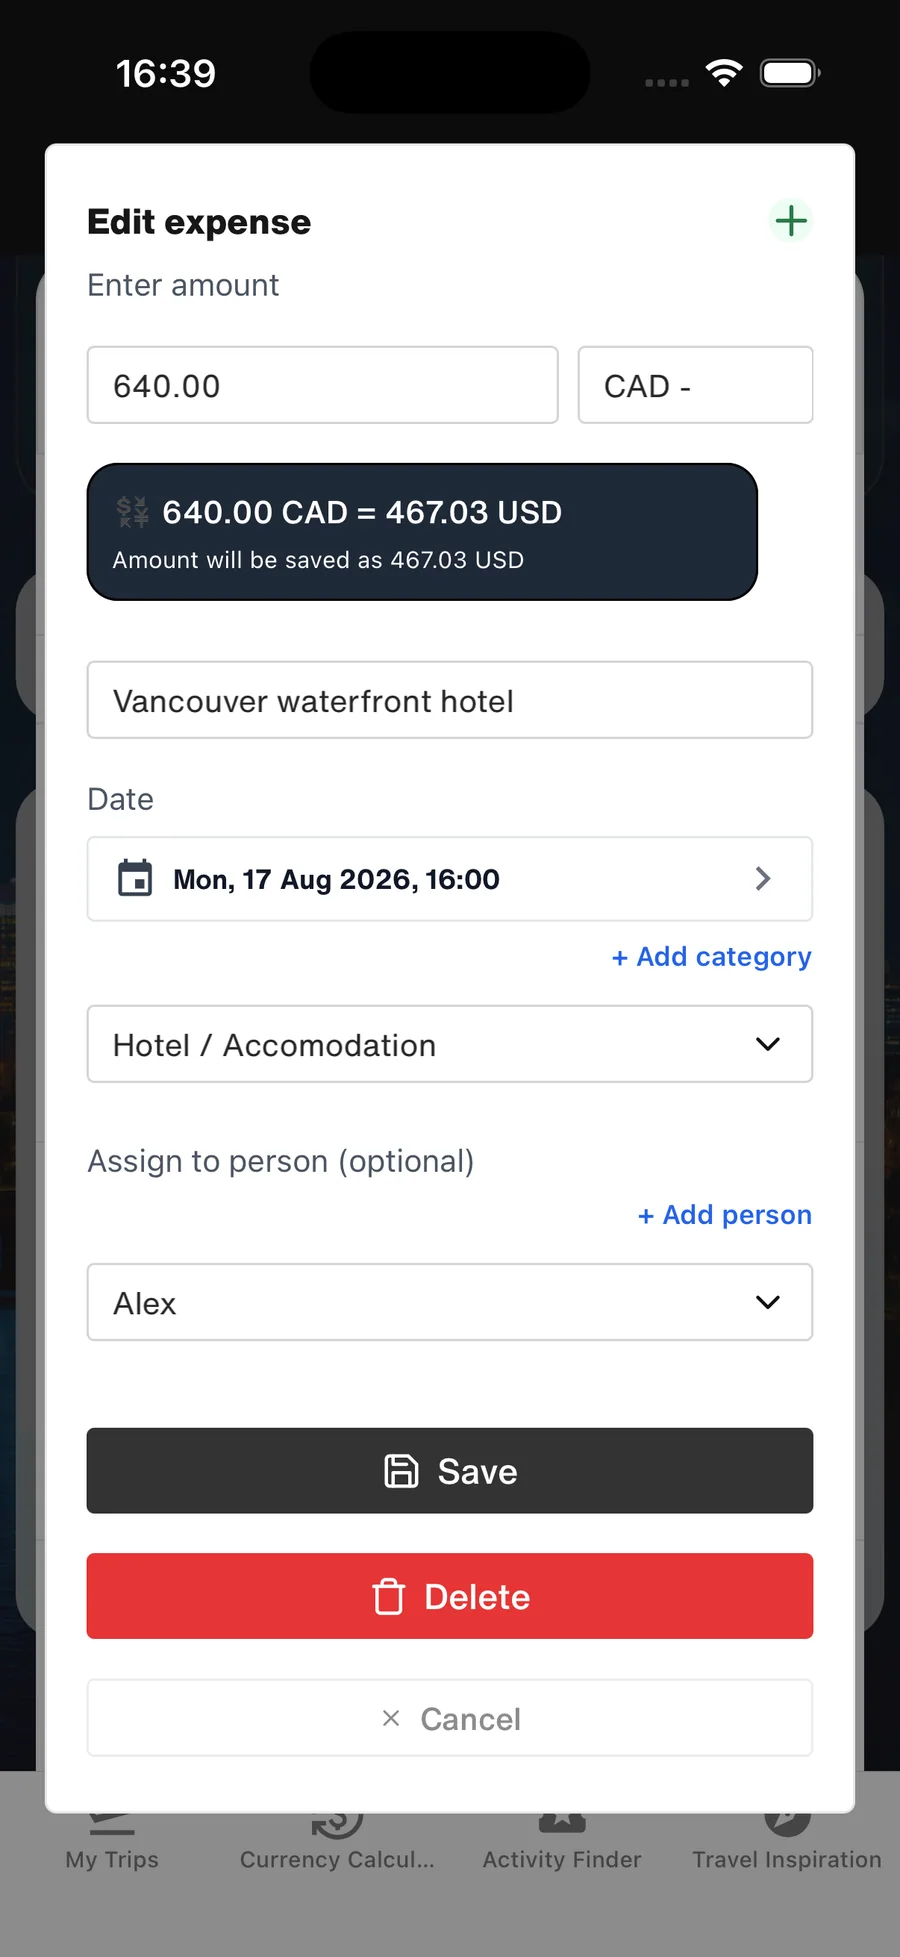
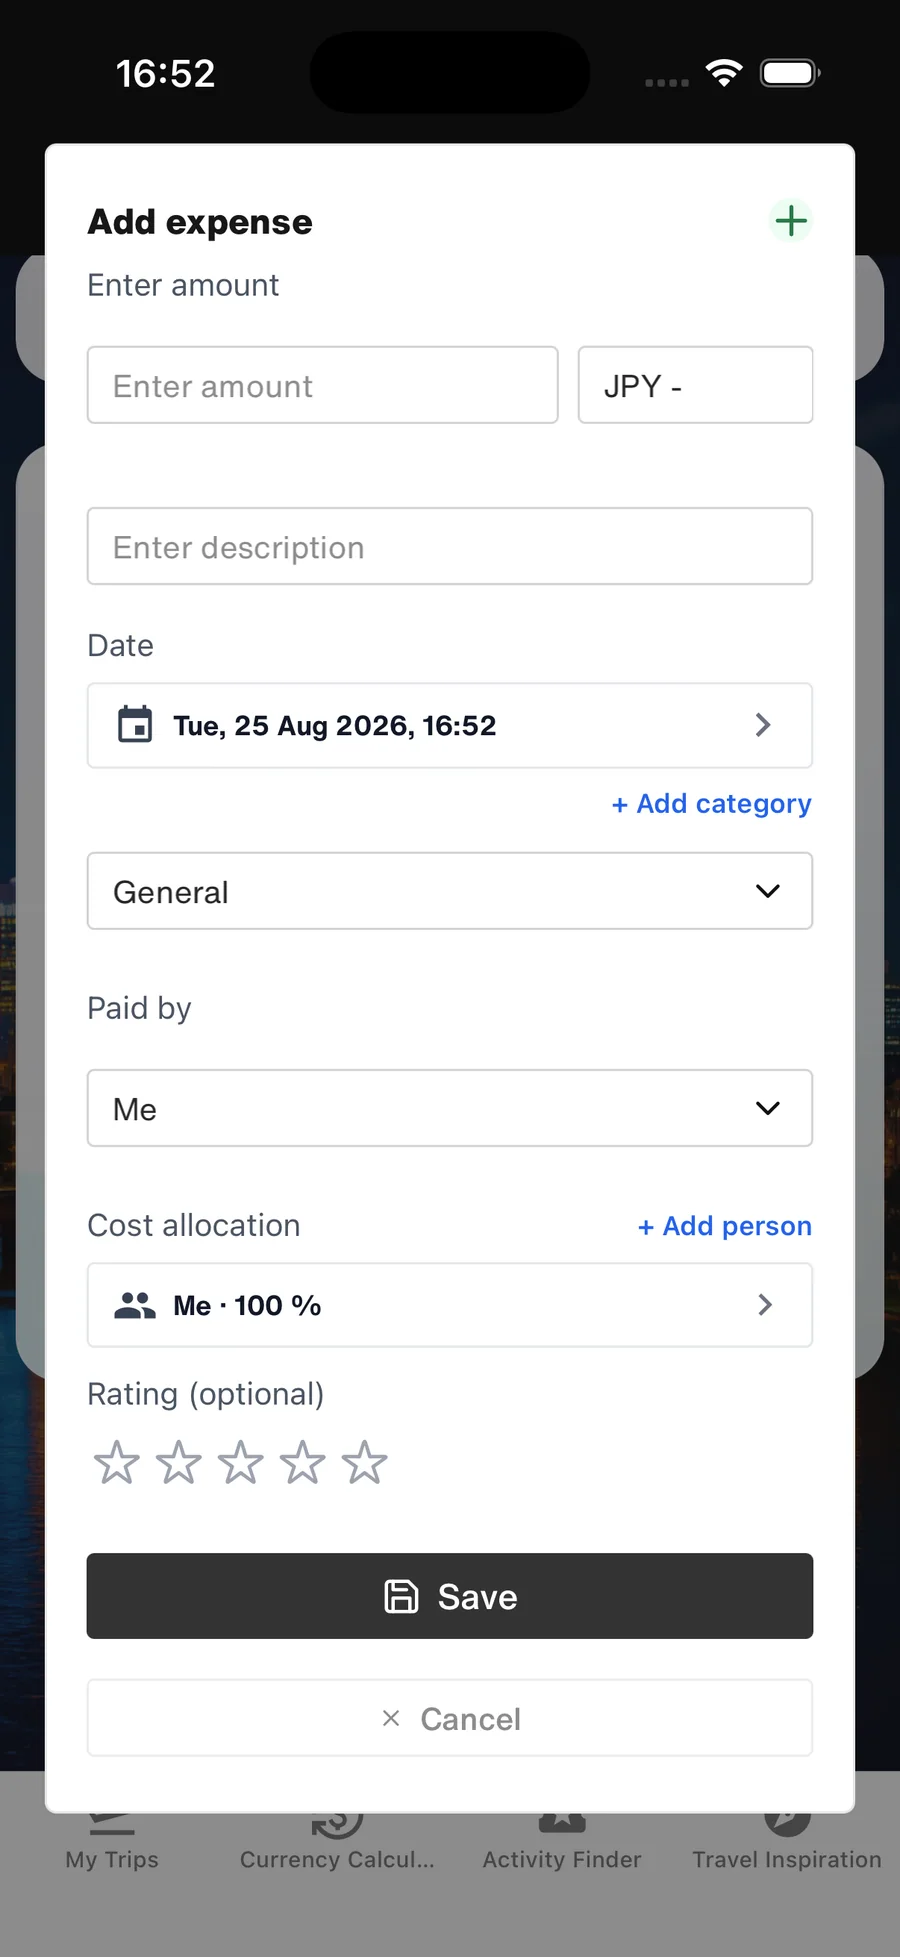
For each expense, enter the amount and currency, a short description and the relevant category. WanderSpend automatically converts the amount into your home currency so that costs remain comparable.
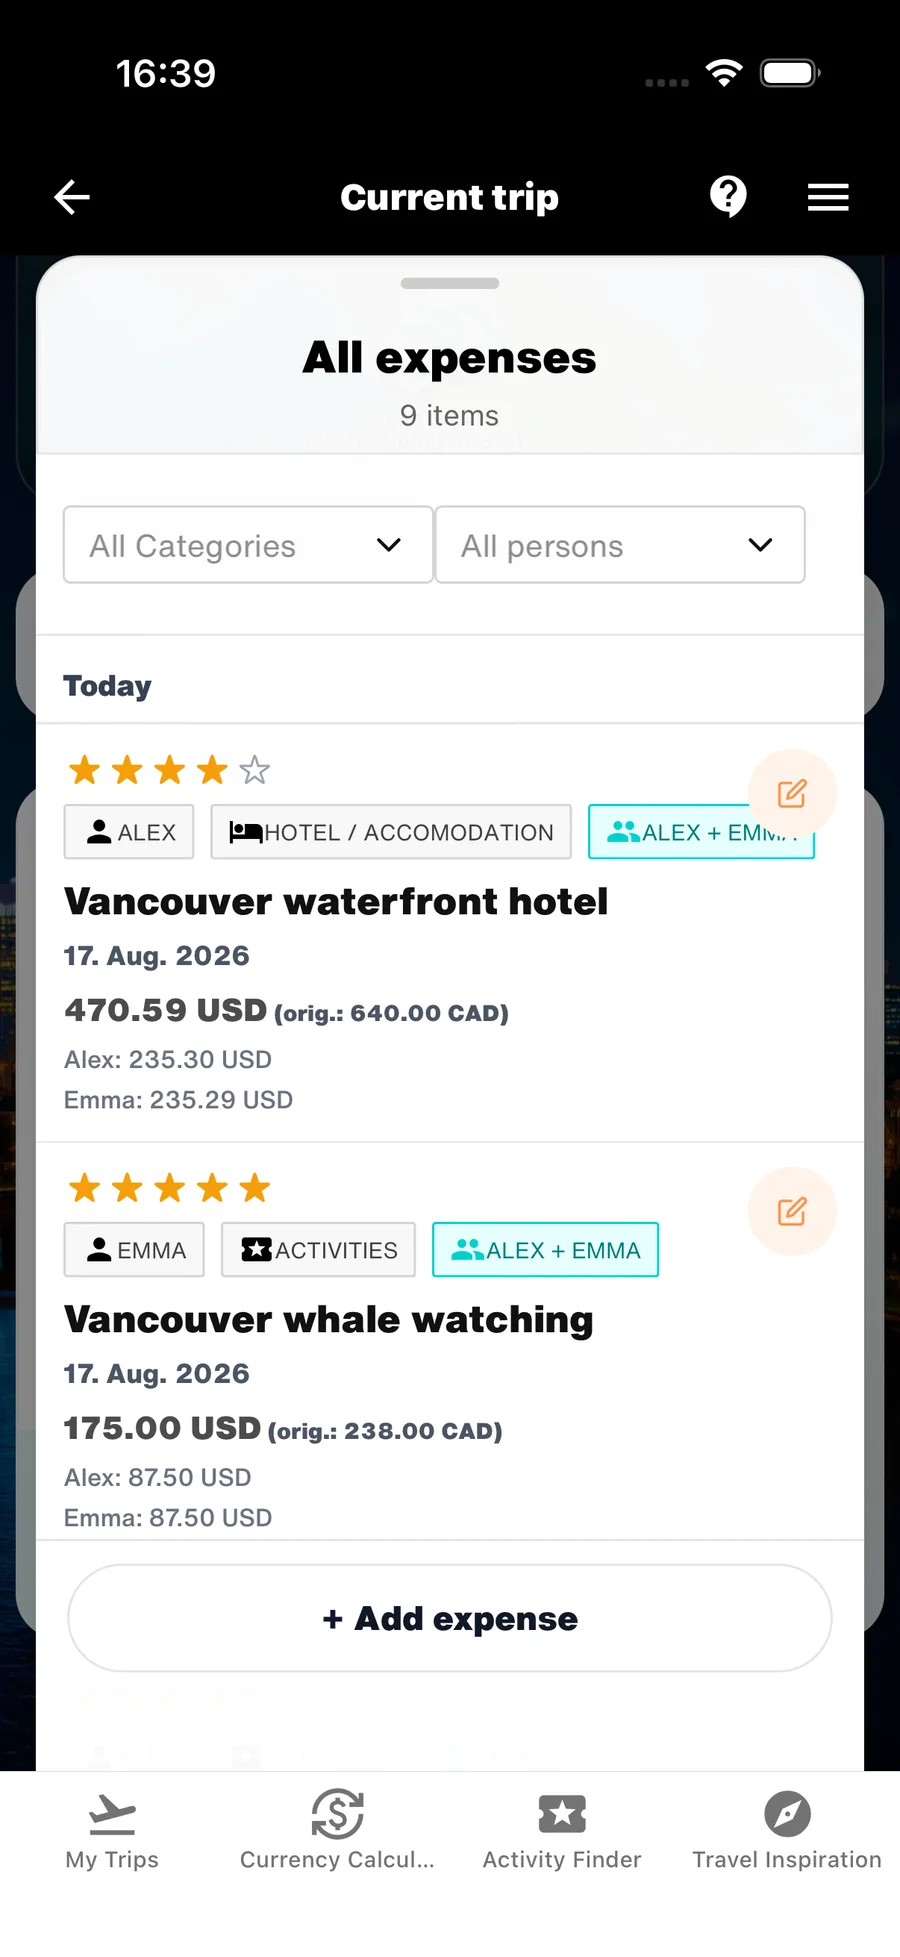
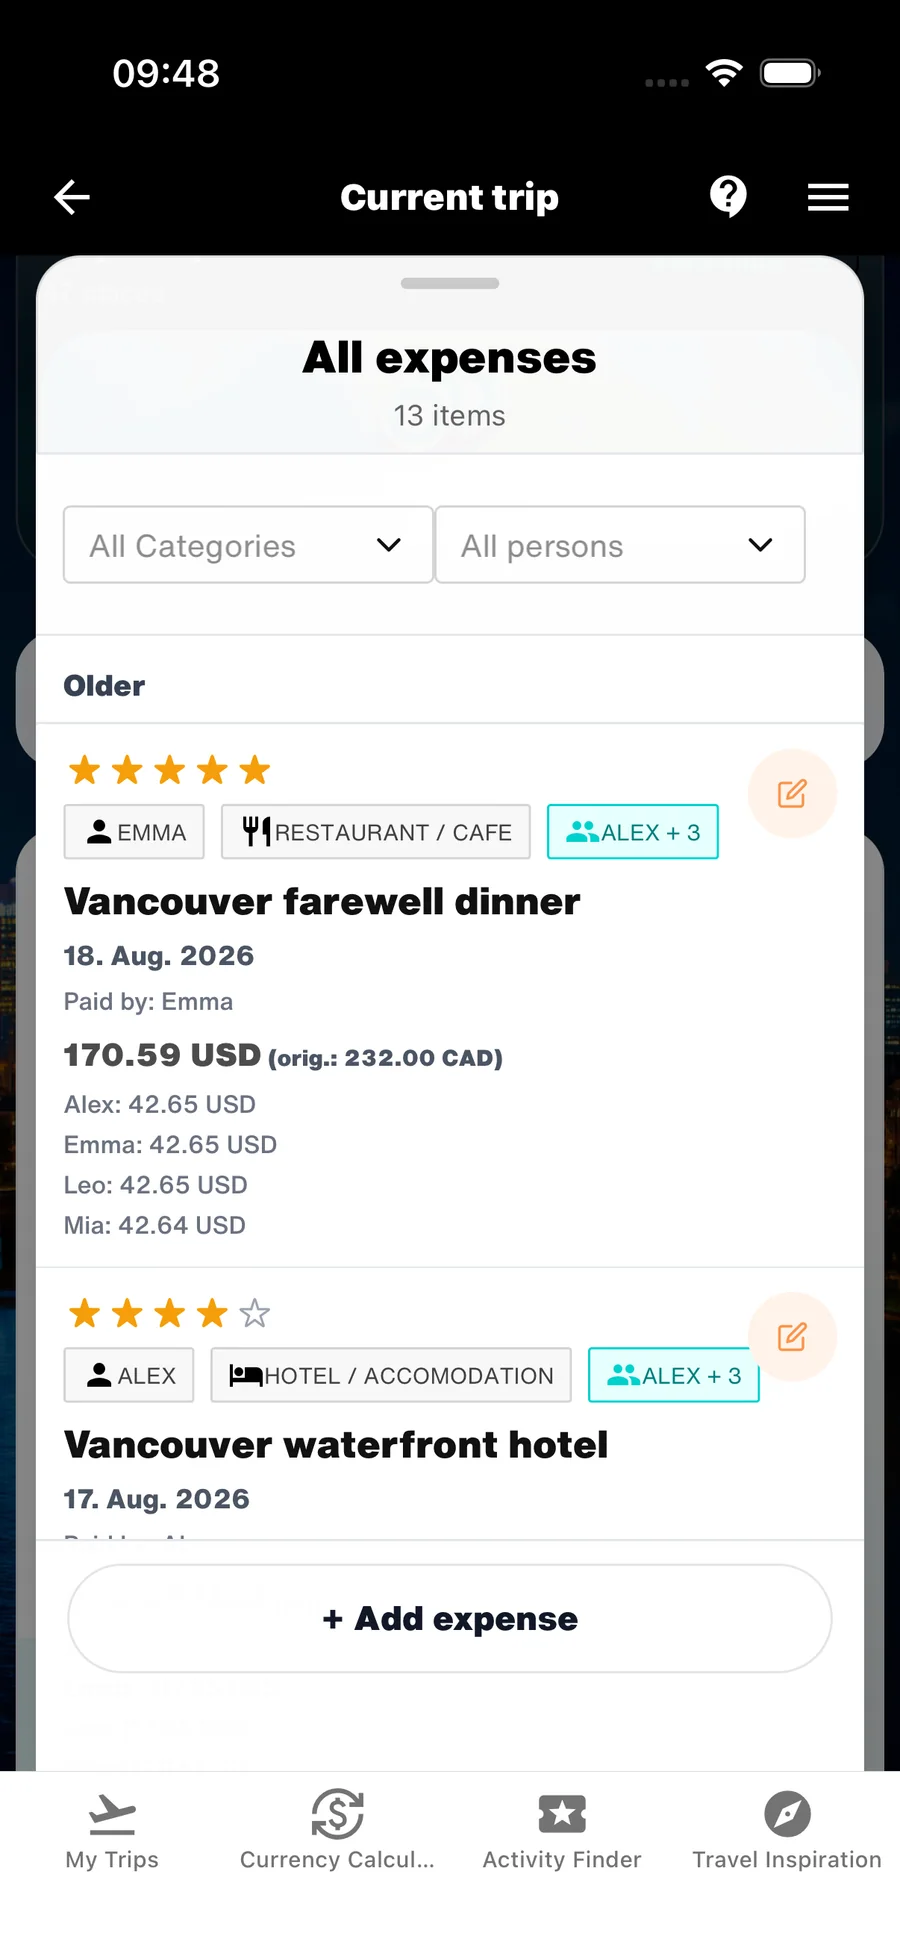
You can edit, correct or delete an expense at any time. Open the expense and tap the pencil icon.
- Use a short description that will still make sense later.
- Check the amount, currency and category after saving.
- Correct or remove accidental entries with the pencil icon.
3. Set up categories and planned budgets
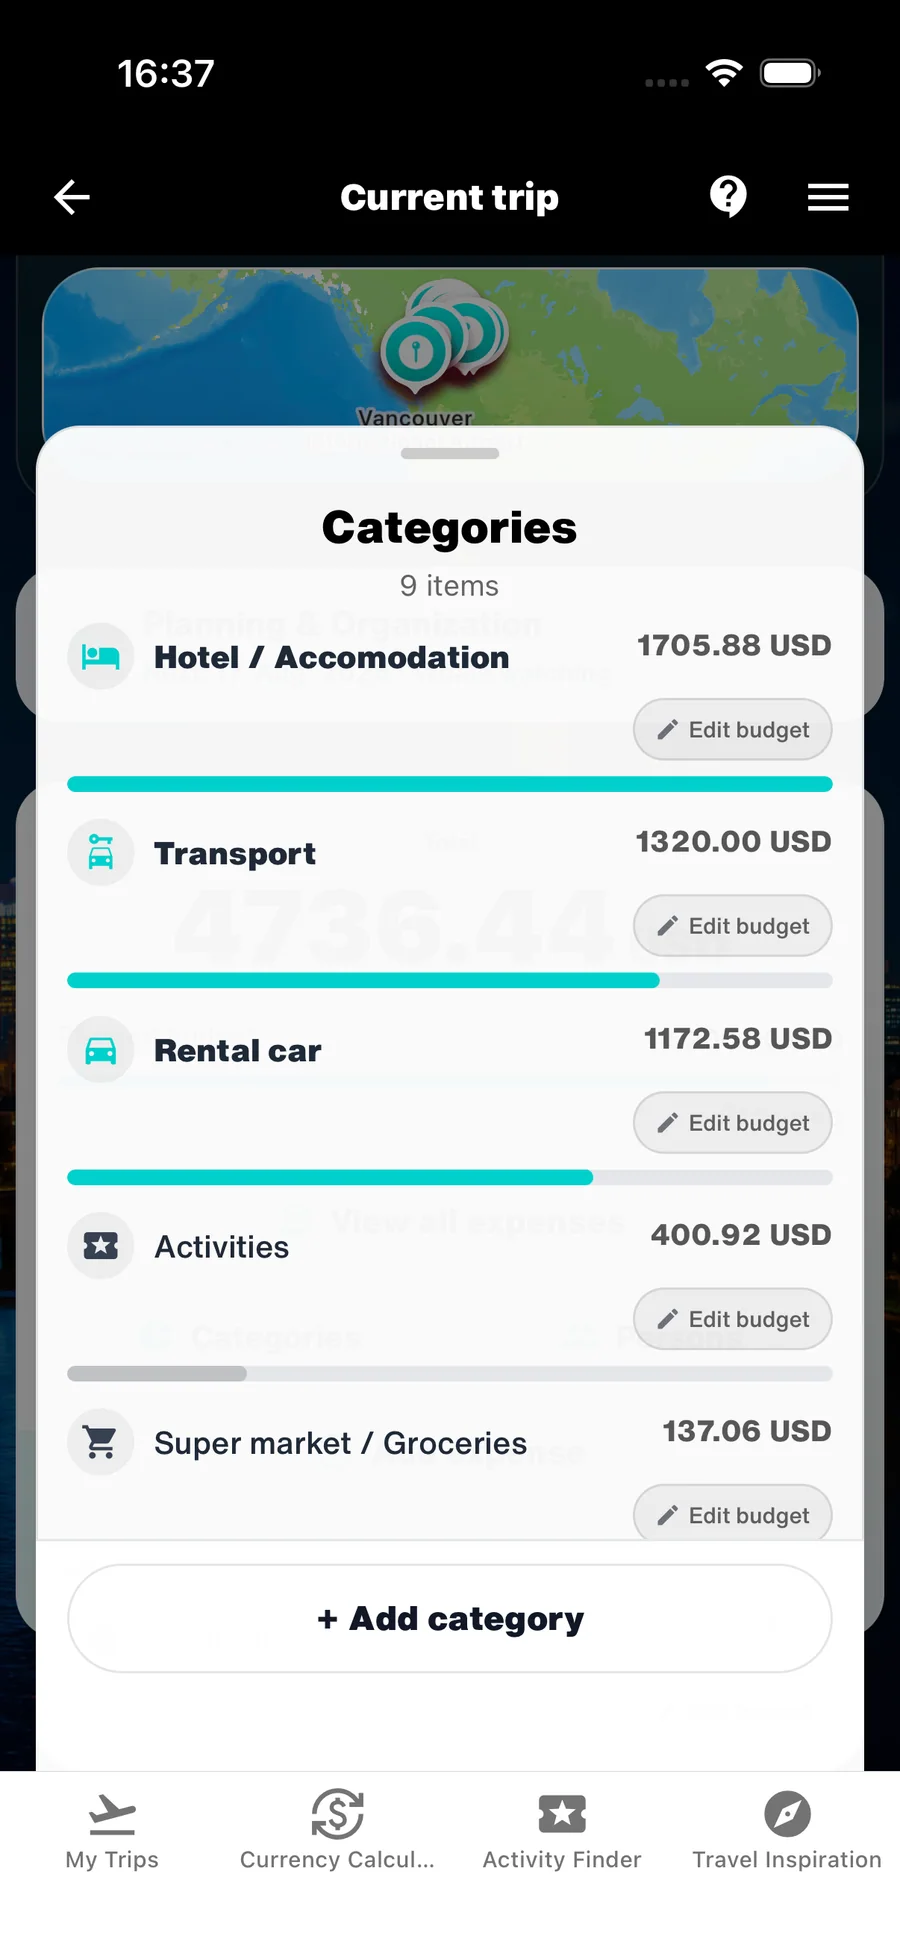
WanderSpend includes nine standard categories for common travel costs. You can also create custom categories when your trip needs a more specific breakdown.
If you do not choose a category, General is used by default. You can also set a planned budget for each category and compare it with the actual expenses later.
- Use the standard categories for accommodation, transport, food and other common costs.
- Create custom categories only when they make the review more useful.
- Set a planned budget per category if you want to structure the trip in advance.
4. Add people and allocate costs clearly
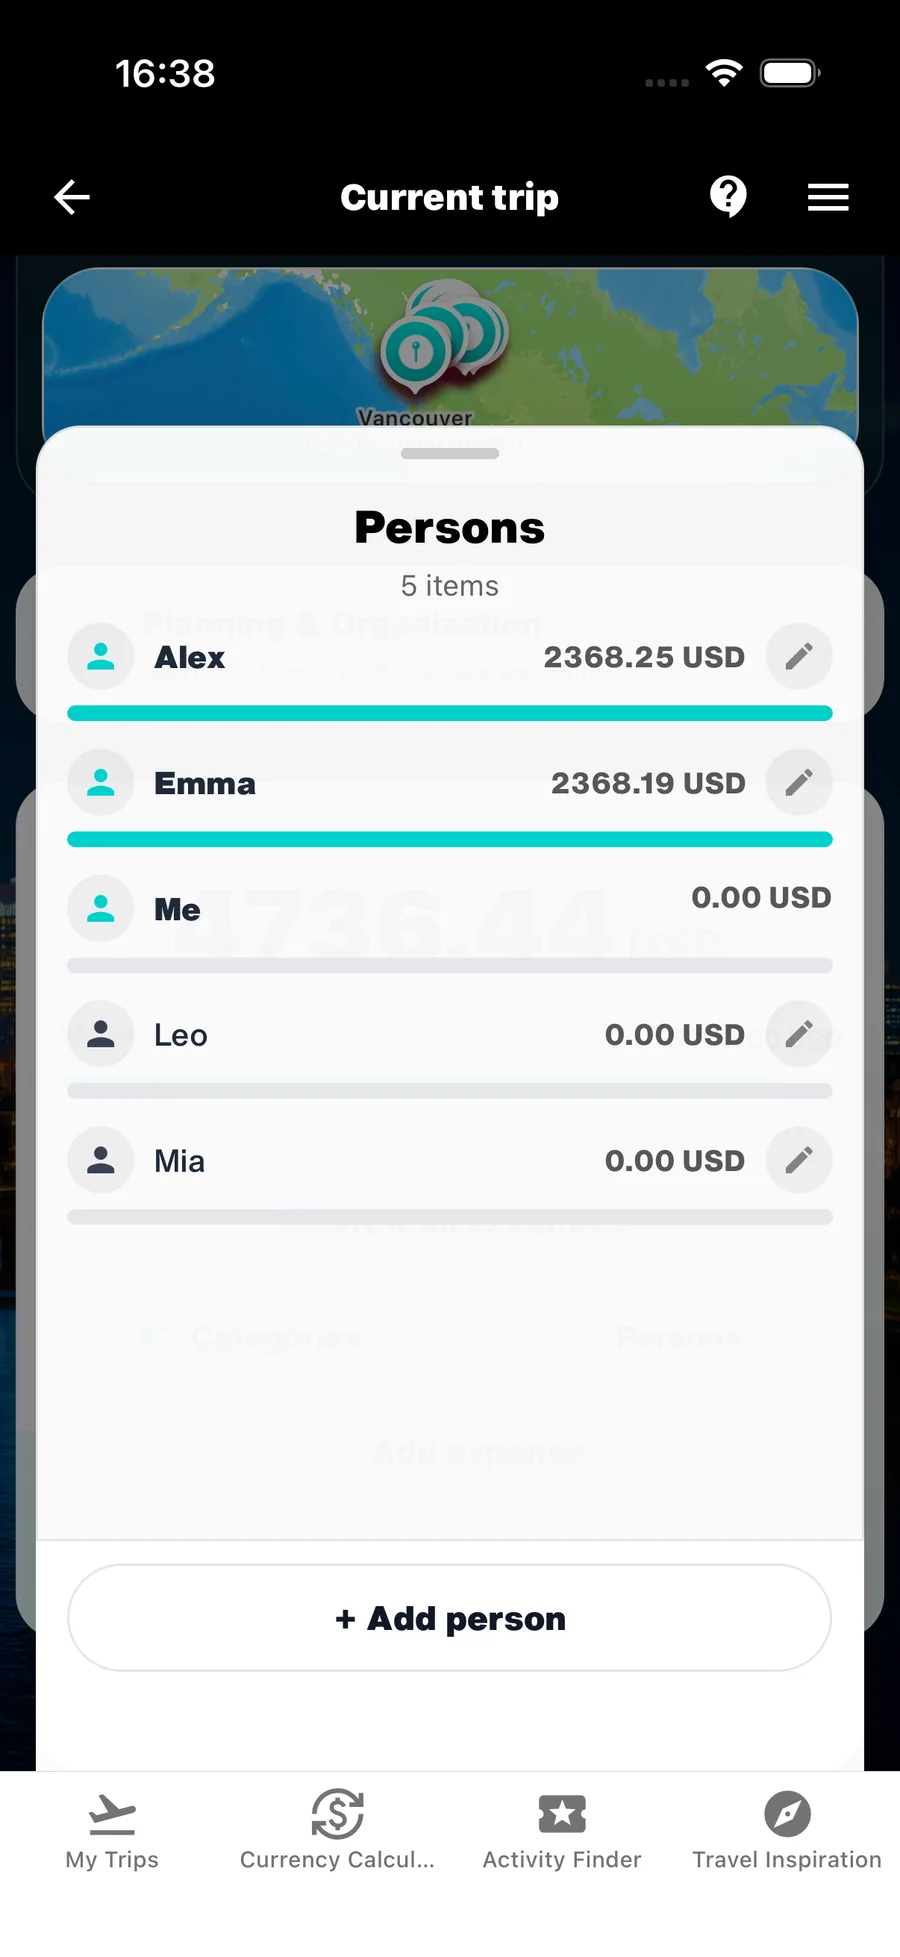
Add people when you want to settle travel costs with others. While Me is the only person, WanderSpend hides the payer and cost-allocation controls and assigns every expense fully to you.
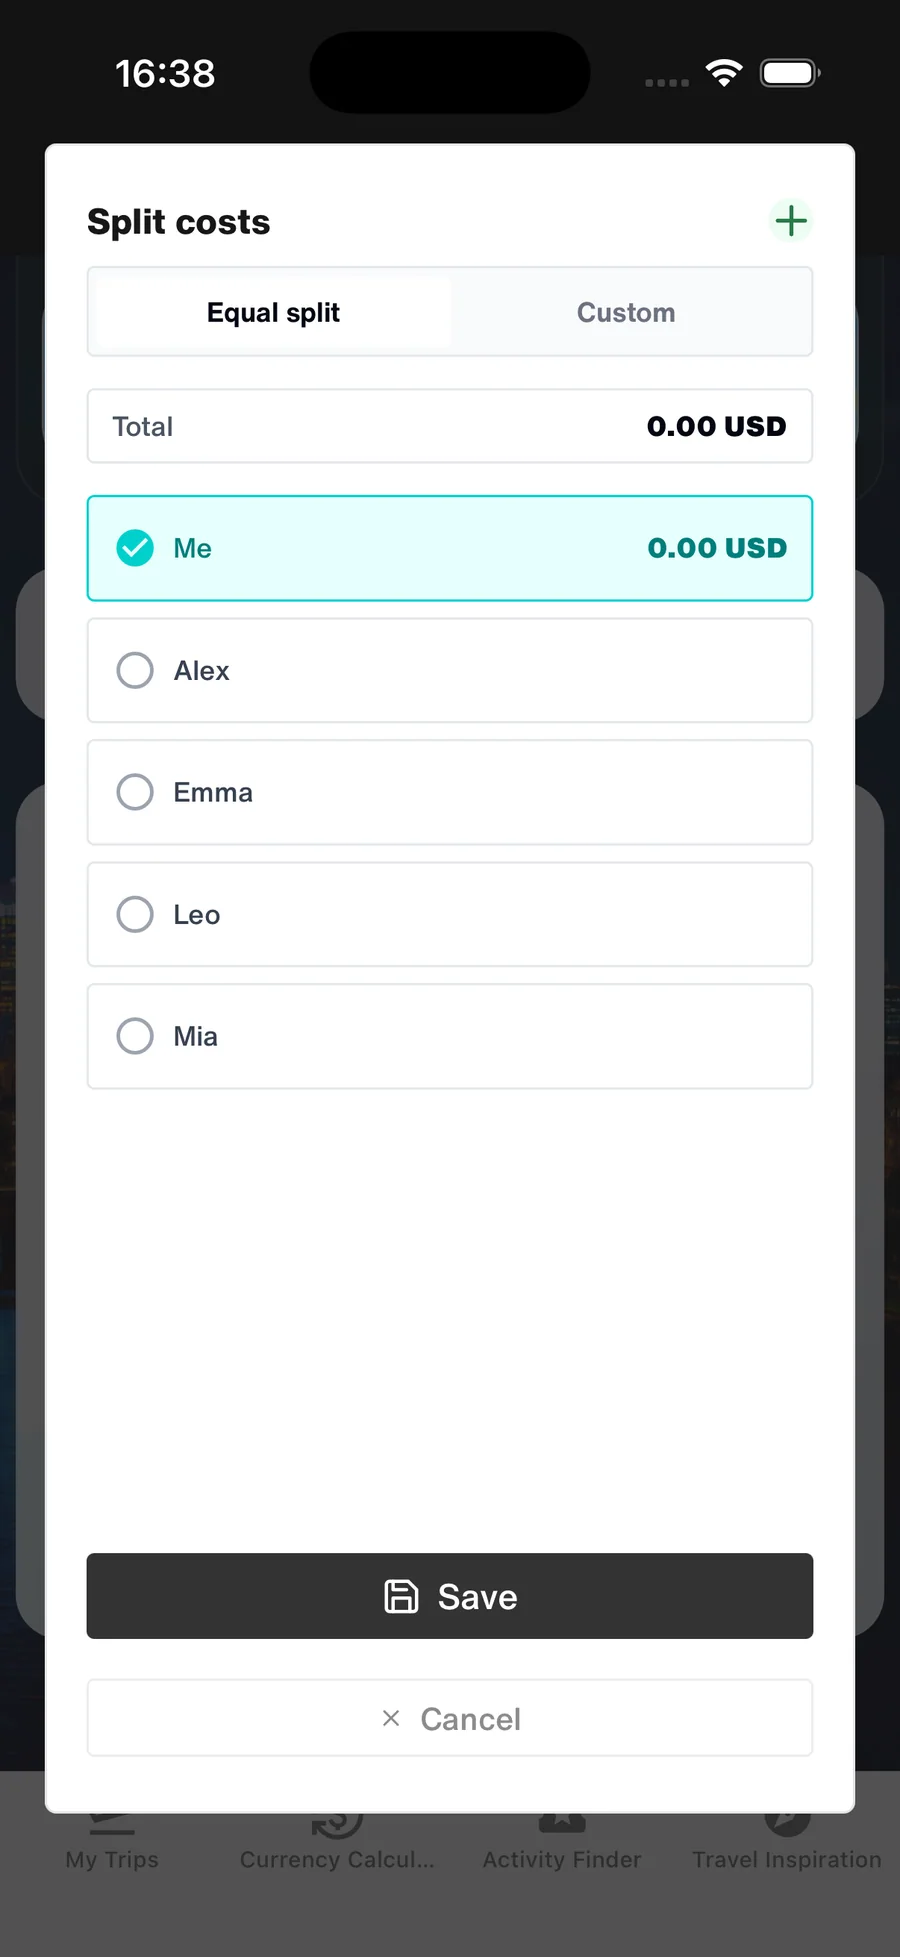
As soon as the trip includes another person, the expense form shows Paid by and one Cost allocation. Open it to divide the expense equally or with individual amounts between the people involved.
- With no additional traveller, 100% is assigned to Me automatically.
- On group trips, Cost allocation starts at 100% for the payer.
- Choose an equal split for simple shared costs.
- Use individual amounts when travellers contribute different sums.
5. Separate who paid from who shares the cost
The expense form separates two things clearly: Paid by records who initially covered the bill. Cost allocation underneath defines who ultimately bears the cost. There is no longer a separate person assignment beside Cost Split.
The allocation initially assigns 100% to the payer. Only open Cost allocation when you want to add other people and divide the amount equally or with individual values.
For example, if Alex pays $120 for dinner and the expense is split equally between Alex, Emma and Leo, Alex paid the full bill but owes only a $40 share. Emma and Leo each owe Alex $40.
Existing cost splits are preserved. An older expense without a payer is left out of Trip Balances until you select who paid. If you actively remove a person from the trip, WanderSpend moves that person’s existing cost share to Me so the full expense amount remains allocated.
- Choose one payer for every new shared expense.
- Open the single Cost allocation only when the payer does not bear the full cost.
- Divide shared costs equally or with individual amounts.
- Edit an expense whenever its payer or cost shares need correcting.
6. See who owes whom in Trip Balances
Balances only appears when a trip contains at least two people. On a solo trip, the Budget Card stays focused on expenses, categories and the travel budget.
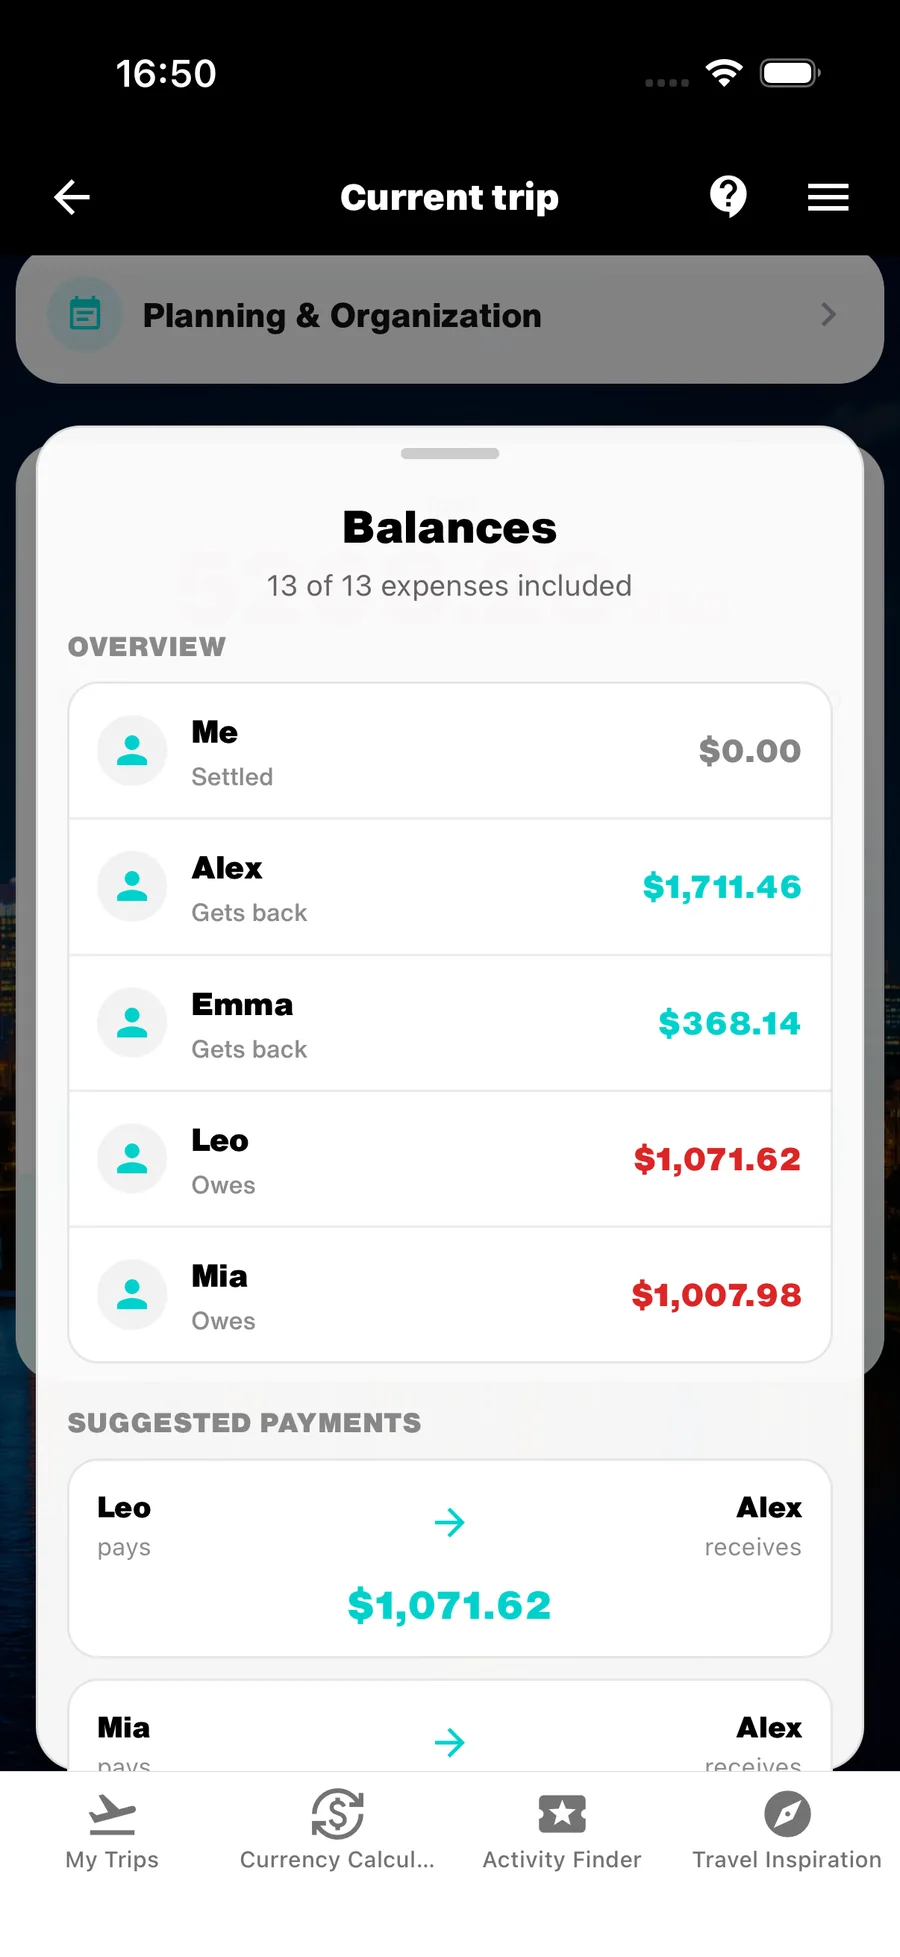
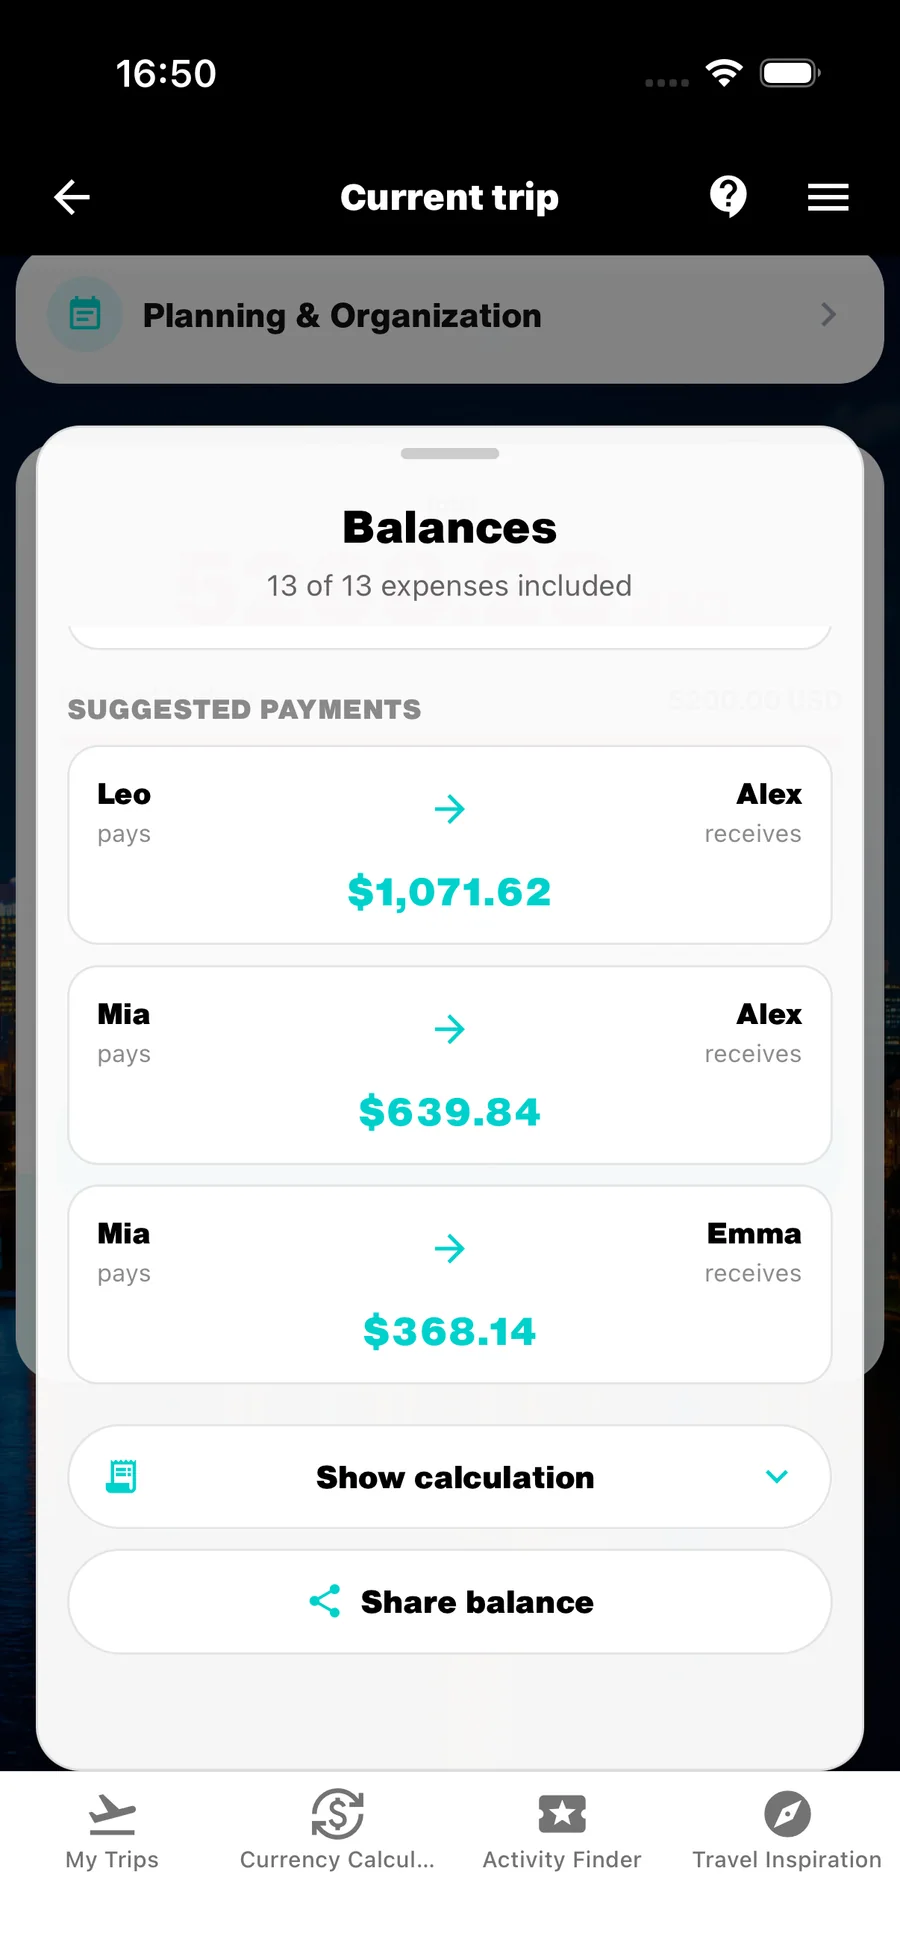
The overview adds up what each person paid and subtracts their own shares across every eligible expense. A positive balance means that person gets money back; a negative balance means they owe money. WanderSpend then suggests as few payments as possible to settle all open amounts in the trip currency.
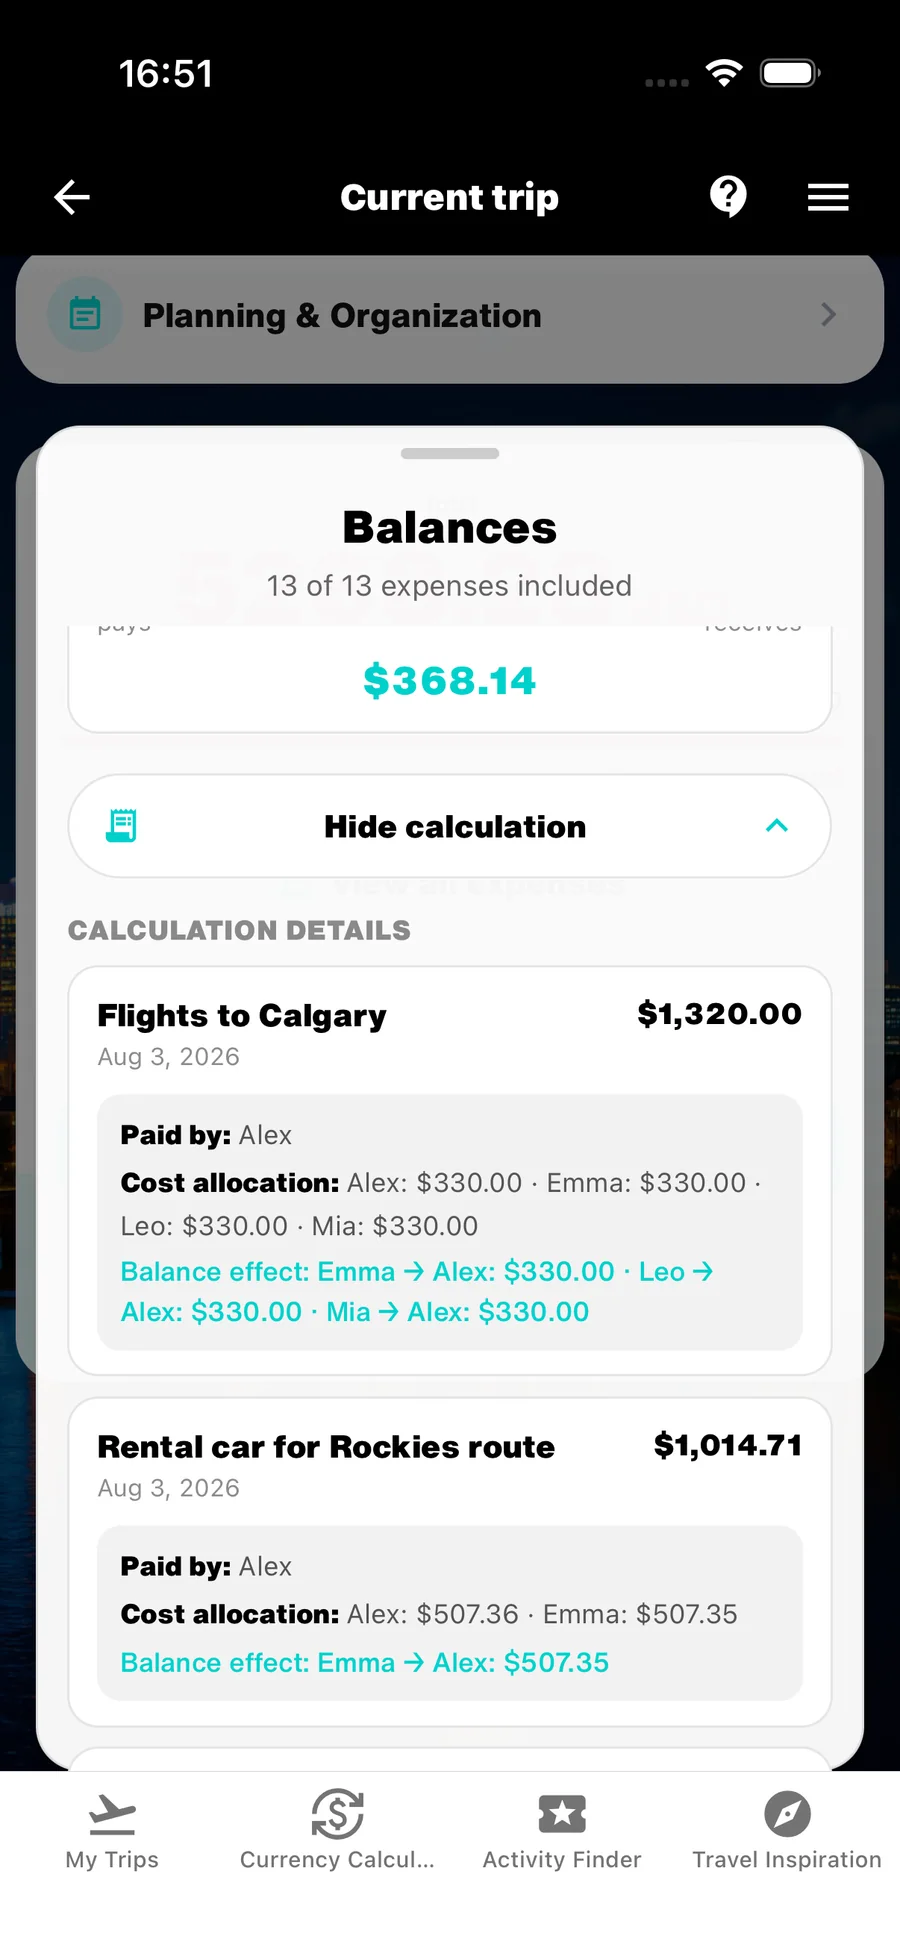
Show calculation opens the full audit trail. For every expense it lists the amount and date, payer, cost allocation and resulting balance effect. An expense borne entirely by its payer has no balance effect. An excluded expense remains visible and explains why, for example when its payer is missing.
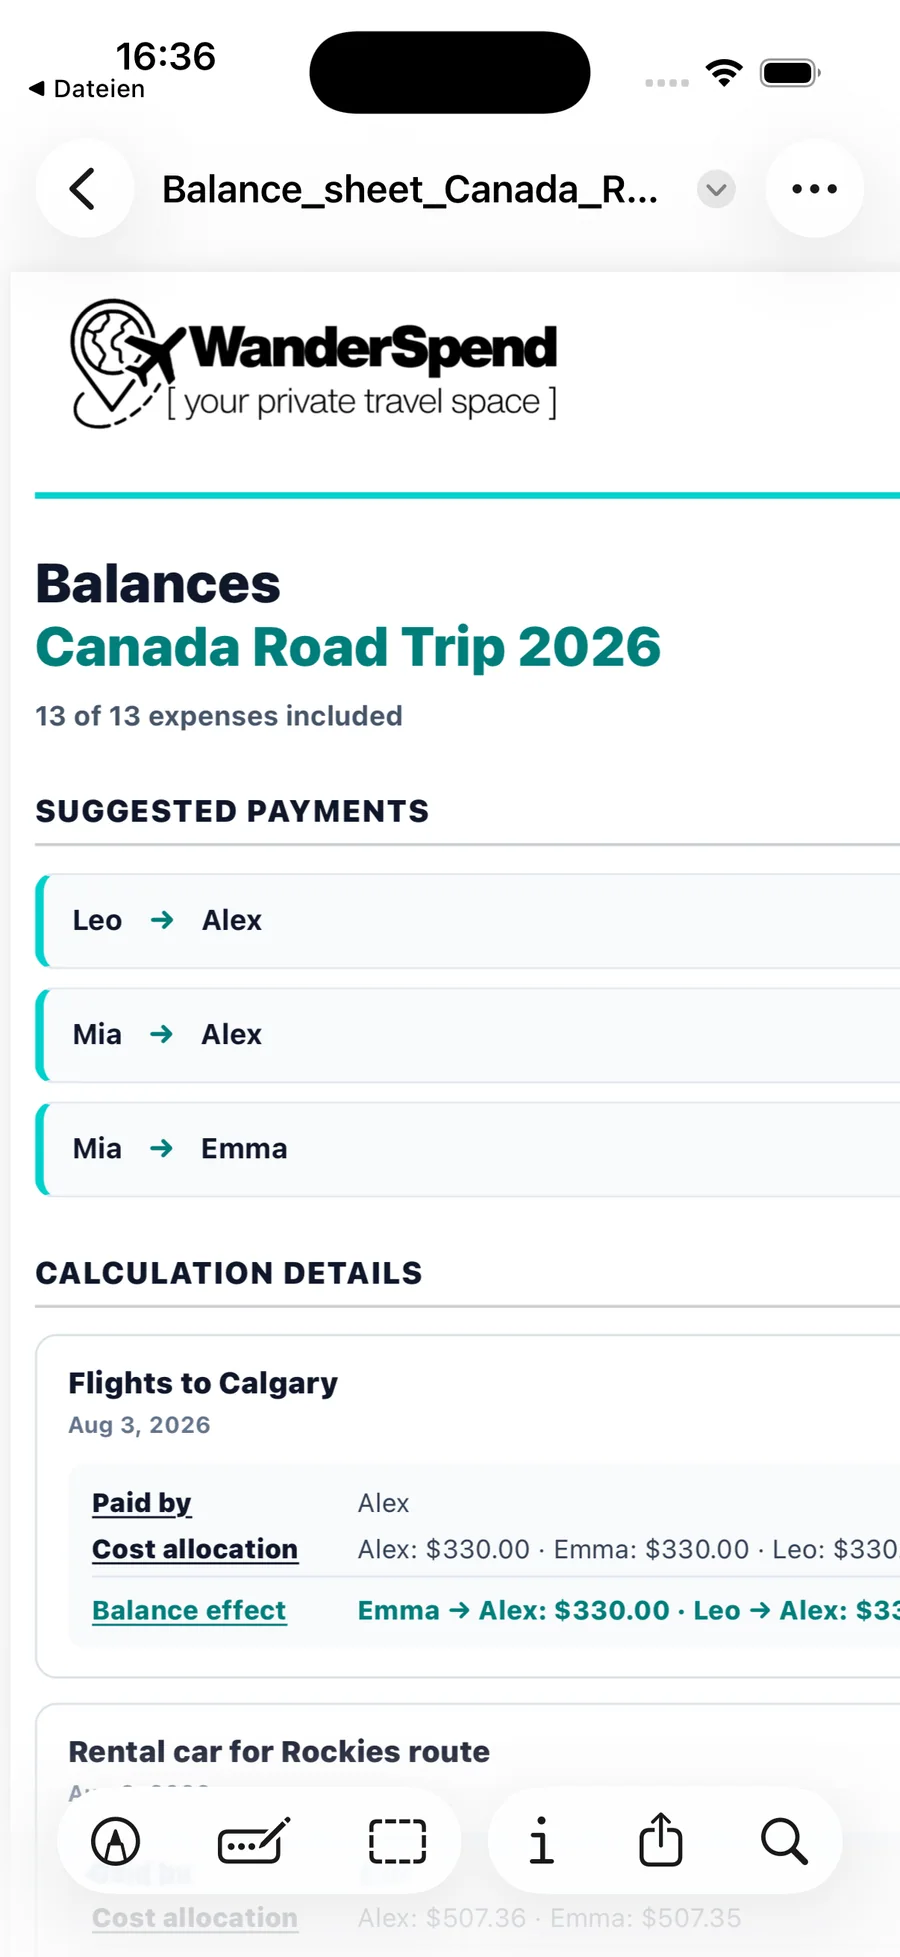
Share balance creates a branded PDF with the suggested payments and complete calculation details, then opens the system share menu. The clearly formatted document can be sent to the group or saved for your records, so everyone can check both the result and how it was calculated.
Version 1 is deliberately calculation-only. You can share the suggested payments, but WanderSpend does not track repayments or offer a Mark as settled action.
- Open Balances from the Budget Card of a trip with several people.
- Check how many expenses are included in the calculation.
- Open the calculation details to check payer, shares and balance effect for every expense.
- Add a missing payer when an expense is marked as not included.
- Share the payments and full calculation with the group when the trip ends.
Balances use the amounts already converted into the trip currency. Calculations are performed in cents so equal and individual splits remain exact.
7. Export expenses as a CSV file
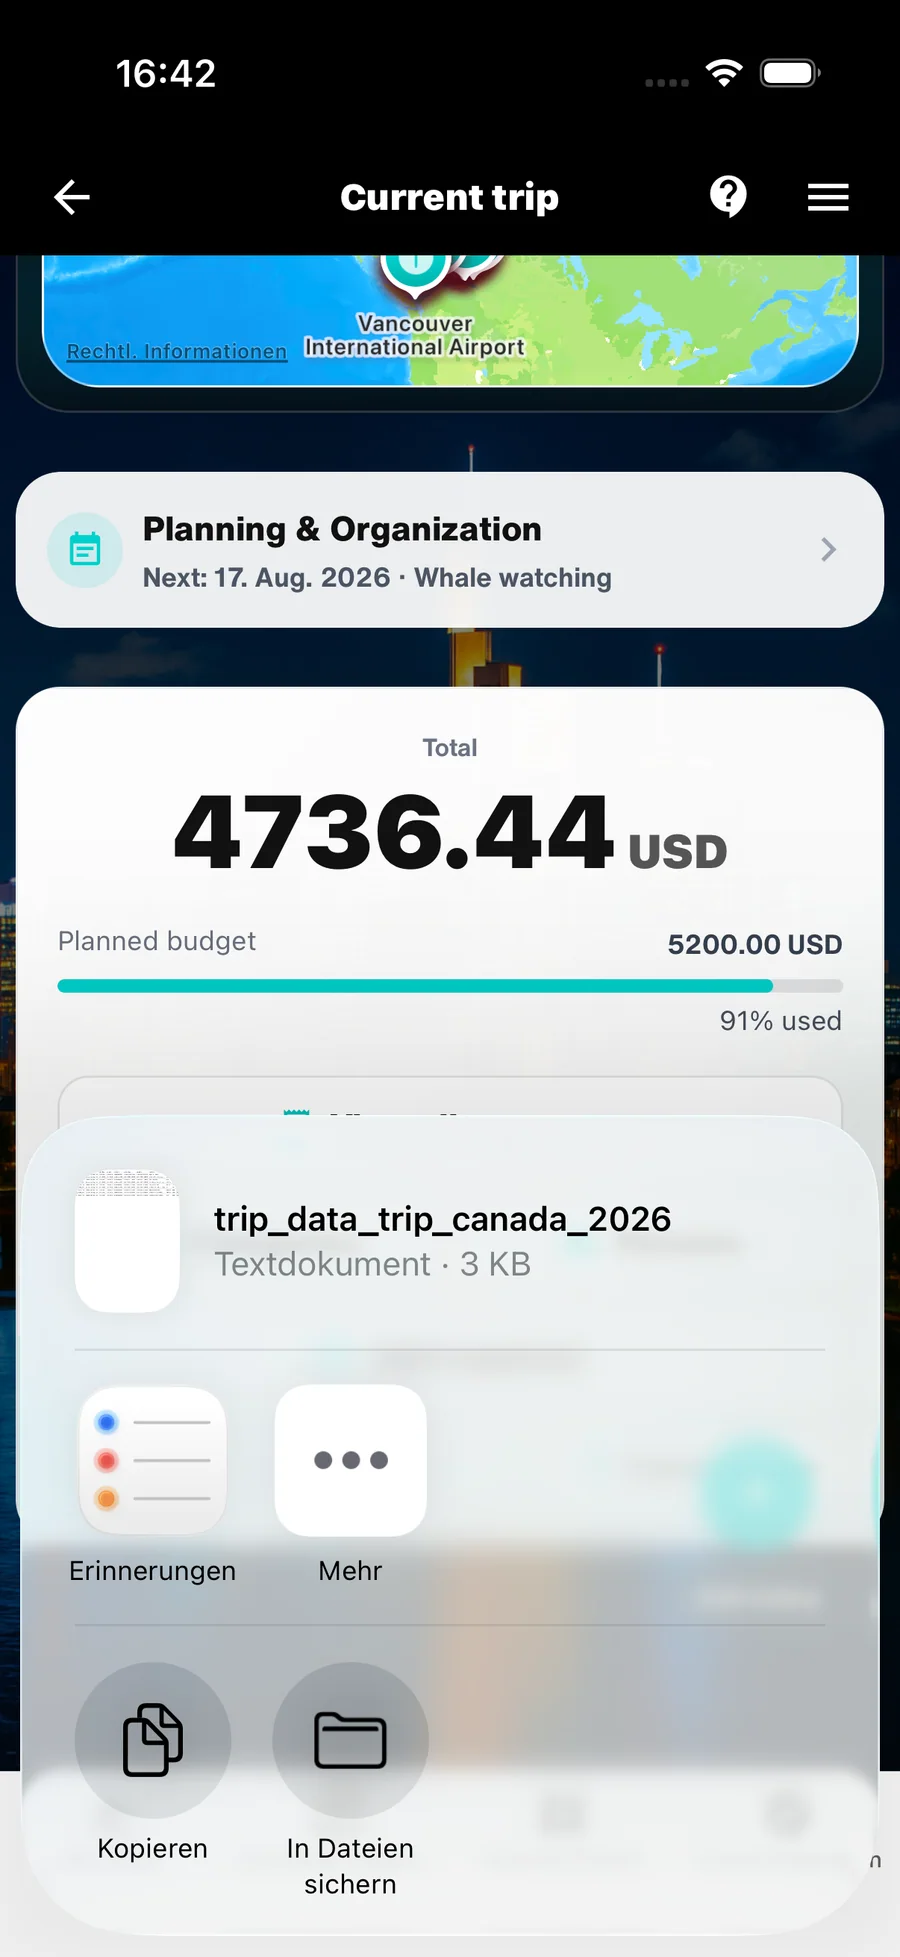
You can export all expenses from a trip as a CSV file. The data can then be used in Excel, Numbers or another spreadsheet app.
The export is especially useful when you want a more detailed analysis, need to share expenses or want to keep a separate personal copy.
- Export the current data before starting your own analysis.
- Store exported files with your other travel records when needed.
Help by feature
- Use WanderSpend before, during and after a tripStep-by-step instructions from creating a trip to memories and your Photobook.Open tutorial
- Documents, notes and checklistsKeep bookings, tickets and practical trip details together.Open tutorial
- Trip Map and placesBuild a visual route and connect places with travel days.Open tutorial
- Trip TimelineTurn dates, places, notes and photos into a day-by-day story.Open tutorial
- WanderSpend PhotobookSee how your timeline grows into an editable printed travel book.Open tutorial